NEW: 2026 Interactive Bible Reading Plan
Begin the New Year with A Chronological Study of The Bible
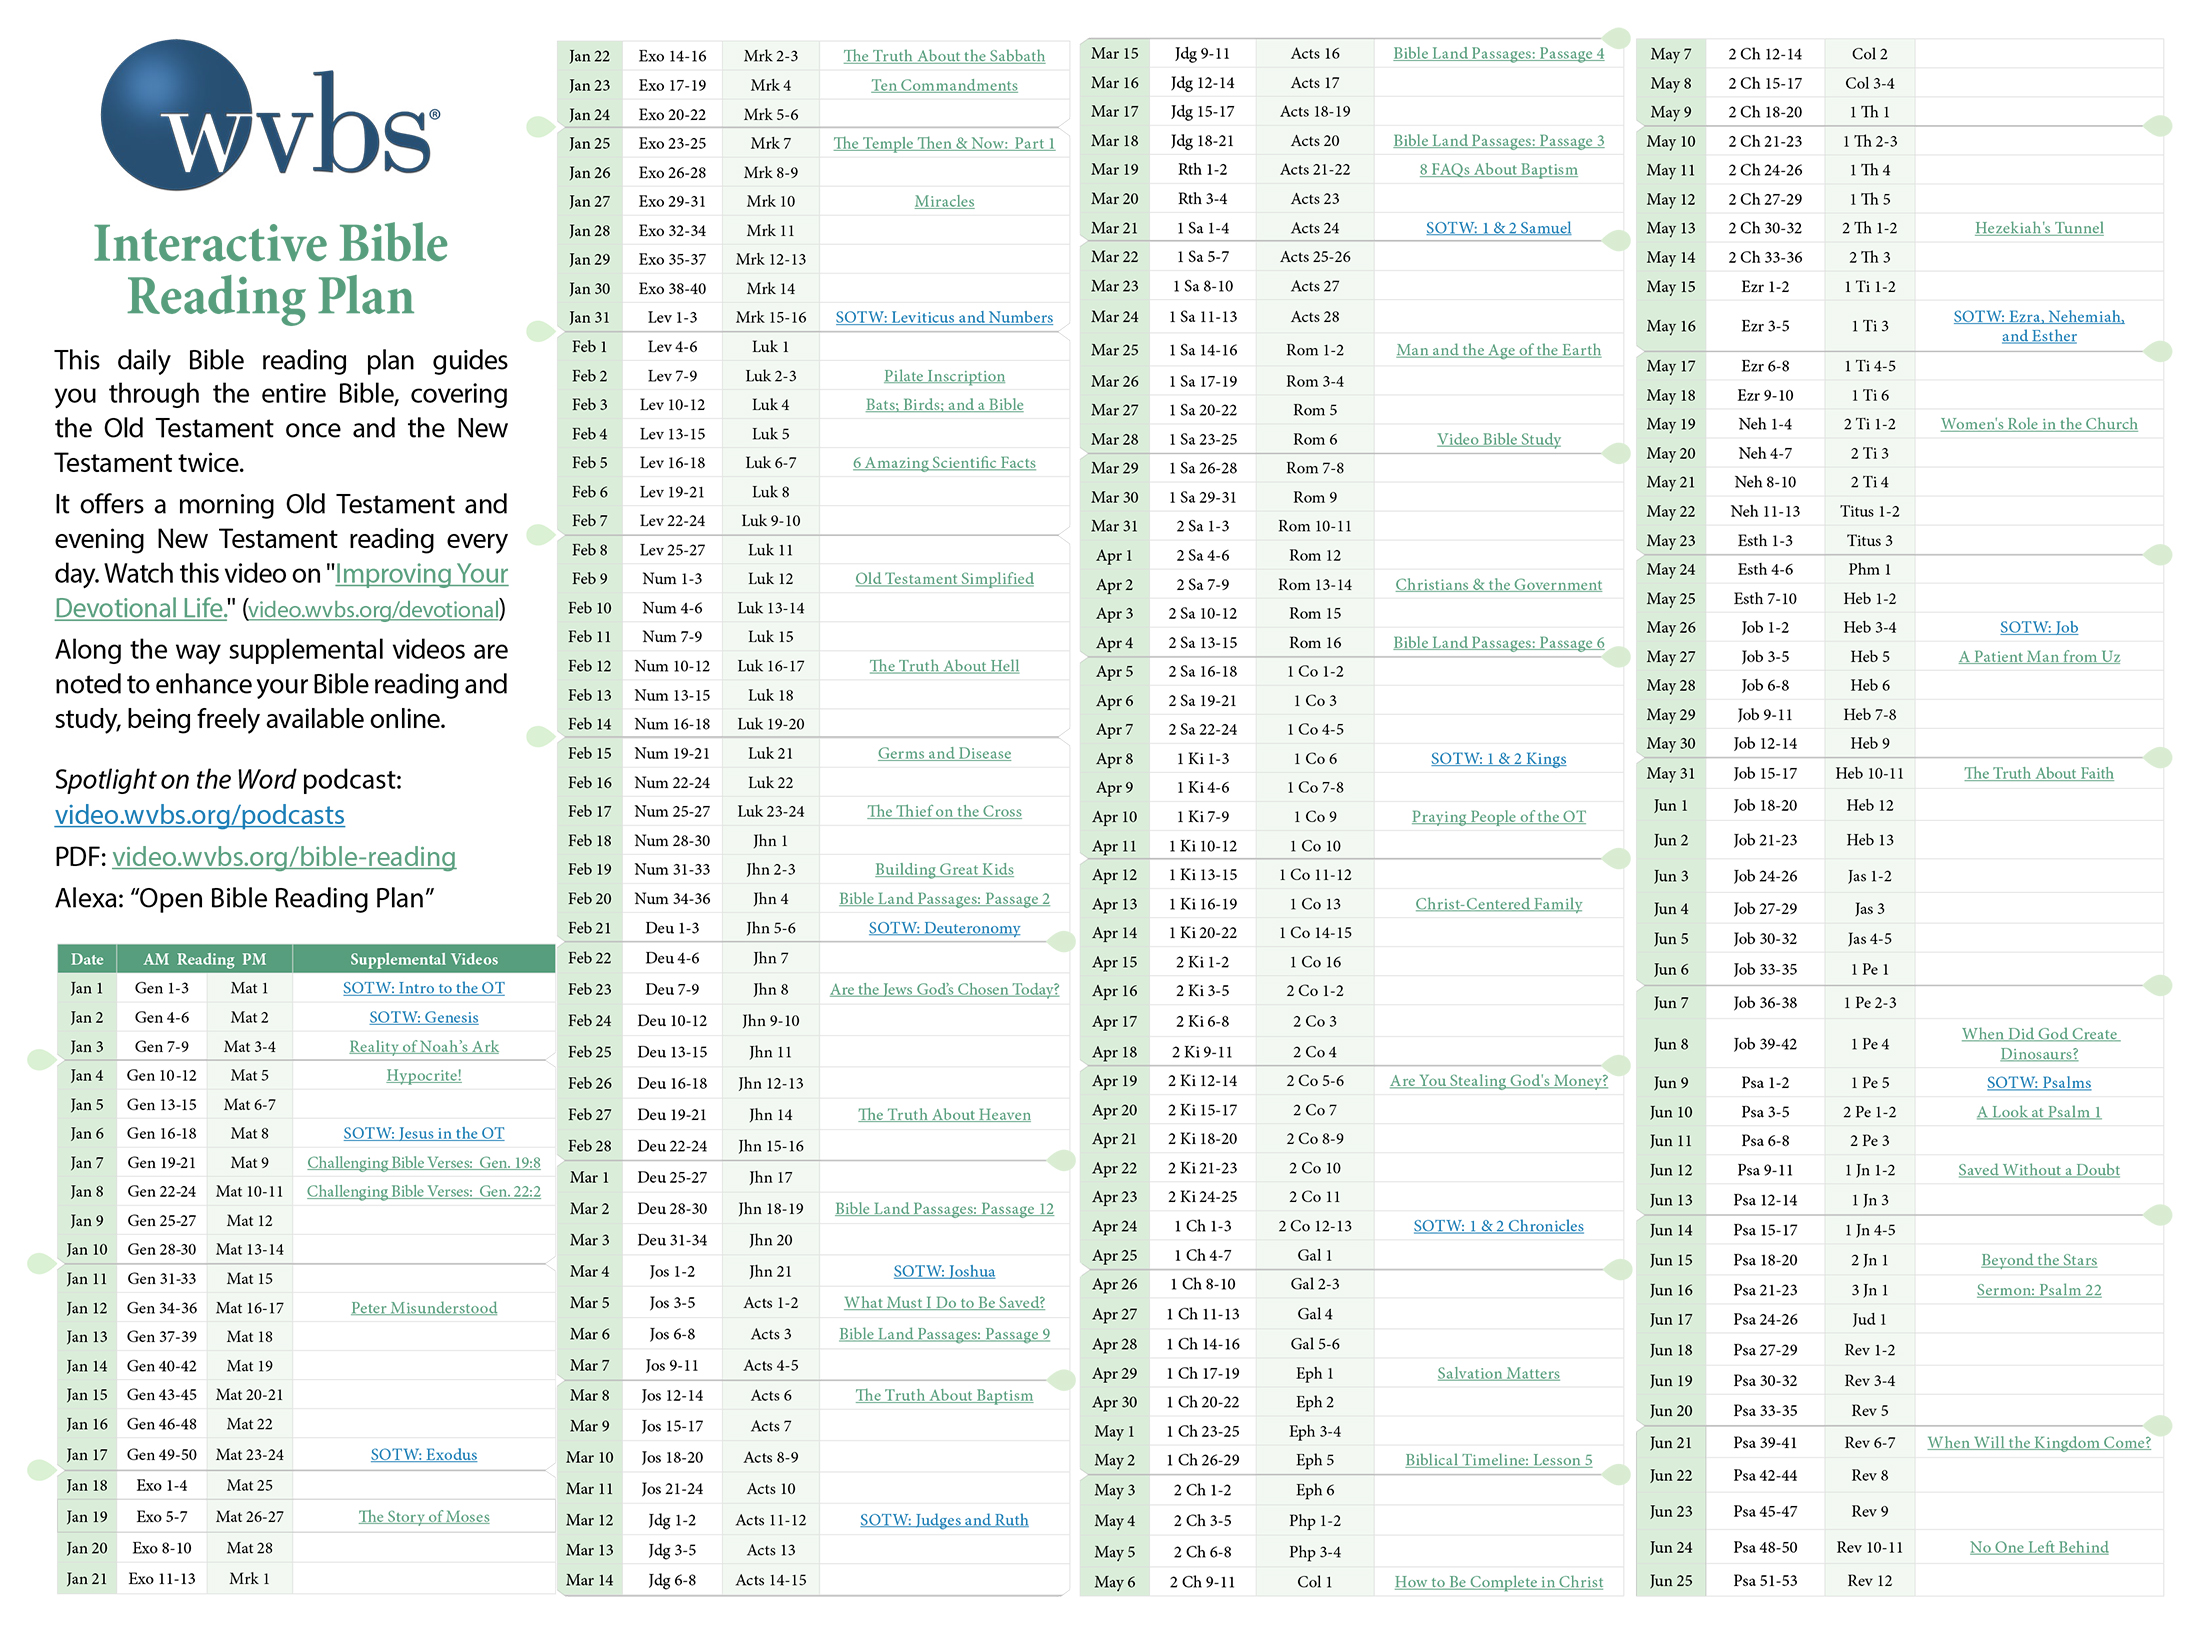
Synopsis: This daily Bible reading schedule will take you through the entire Bible from cover to cover in one year. Along the way, enjoy book overviews and supplemental videos to enhance your study. The interactive PDF includes direct links to all video content.
Additional Resources:
– Audio Podcasts: Apple iTunes and Google Play
– Ask Alexa to find out the day’s reading: Enable WVBS Bible Reading Plan
– DVDs and USBs available to purchase from WVBS.org
Please Share:
– With friends and family
– With your congregation’s leadership (elders, preacher, etc.)
– With fellow Christians
– With friends through social media
Over 150,000 plans downloaded since 2018.

Add the Interactive Bible Reading Plan to Your Online Calendar
Instructions for Adding to Google Calendar
1. Open Google Calendar.
2. In the top right, click the gear icon for Settings, then choose Settings.
3. In the menu on the left, click Add calendar, then click Create new calendar.
4. Give the calendar a name (like Daily Bible Reading) and a description, then click Create calendar. After a few seconds, a new calendar will be created.
5. In the menu on the left, click Import & Export.
6. Click Select file from your computer and select the file you downloaded.
7. Change Add to calendar to show the new calendar you just created.
8. Click Import. After a few seconds, all the reading assignments will be added to the calendar.
*IMPORTANT NOTE: These steps must be performed on a desktop or laptop computer. They cannot be done on a smartphone or tablet.
Instructions for Adding to Apple Calendar
1. Open the Calendar app.
2. Click File, then click New Calendar.
3. Give the calendar a name (like Daily Bible Reading), then press Return.
4. Click File, then click Import.
5. Select the file you downloaded earlier, then click Import.
6. Choose the calendar you just created.
*IMPORTANT NOTE: These steps must be performed on a desktop or laptop computer. They cannot be done on a smartphone or tablet.